ProcessQ for High-Volume Workflows |

|

|
|
|||
|
|
|
|
|
|||
ProcessQ for High-Volume Workflows |
|
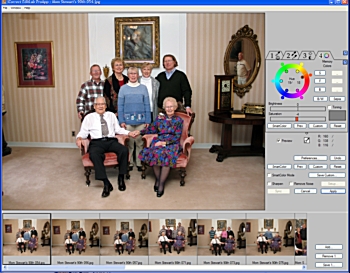
At the heart of iCorrect EditLab ProApp is ProcessQ, the completely redesigned image queue that allows you to easily view, sort and manage your color corrections for efficient, time-saving workflows. Here is how to make ProcessQ work for you. We color corrected 15, 3MB+ images with similar color issues in 2 minutes and 4 seconds. Try that in Photoshop!
Step 1-Setting iCorrect EditLab ProApp
Workflow Preferences
The first step is to customize EditLab ProApp's preference settings for the
specific job or your desired workflow. You can access the Preferences
selection window by clicking on File Menu/Preferences or the Preferences
button located under the color tool panel. Detailed instructions for each
preference category can be found in the
User Guide.
Each preference has a "recommended" default setting, however, each preference
can be optimized to maximize your efficiency and workflow.
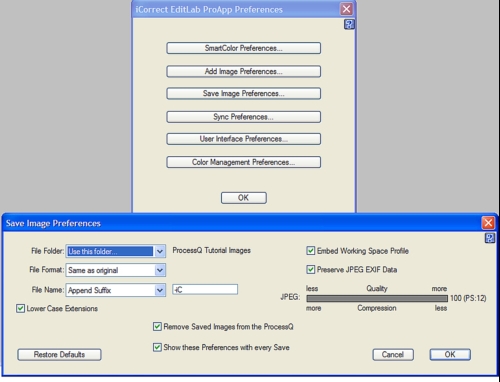
In our example job we used the default settings in each category except for the Save Image File Folder
|
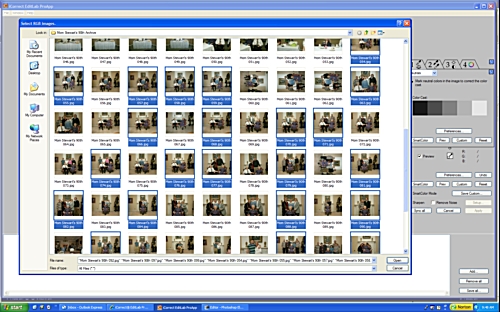
Step 2-Add Images to ProcessQ Next we select and add images to the ProcessQ by clicking on the File Menu/Add Images to ProcessQ and selecting the pictures to be corrected from a folder
|
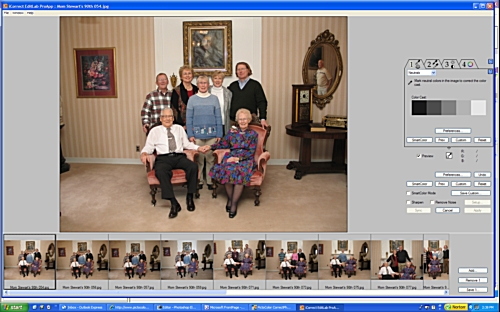
Step 3-Color Correct Test Image
Next we select an image from the set that represents the average color of the batch and color correct it using the EditLab ProApp tool set.
|
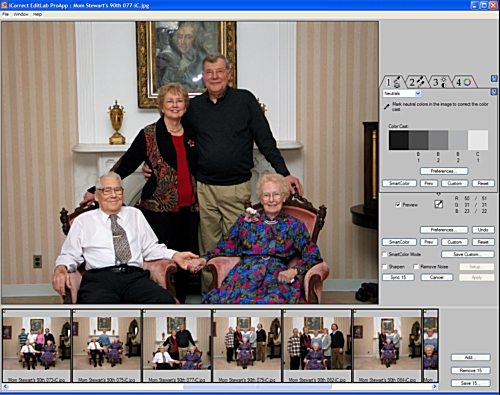
Tool Tab 1: Color Balance
With the first tool tab, you begin by correcting the color balance by simply clicking on any neutral (black, white, or gray) colors within the image. In this case the display shows that the original image had a predominantly yellow color cast. |
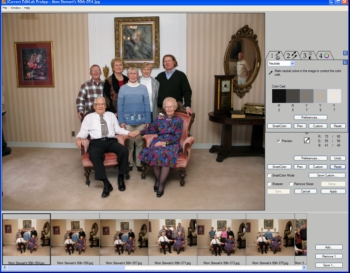
Tool Tab 2: Tonal Range
The next tool tab establishes the tonal range by automatically setting a new black point and new white point. You can also adjust the mid tones in the center of histogram display.
|
|
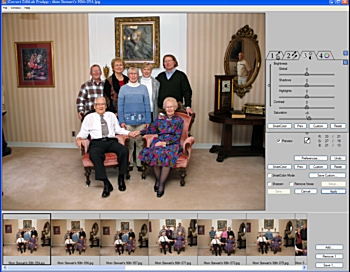
Tool Tab 3:
Brightness/Contrast/Saturation
The third tool tab addresses brightness, contrast, and saturation. You can even adjust the highlights and shadows independently. We simply increased the saturation slightly.
|
Tool Tab 4: Hue-Selective Editing
The final tool tab allows you to finely tune specific colors on a hue-selective basis. Simply activate a color on the hue-wheel by clicking on a color in your image. You can then adjust its hue along the color wheel as well as independently adjust its brightness and saturation. We used the skin tone memory color to improve the skin tones. Click Apply to finish. |
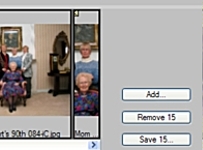
Step 4-Apply Color
Correction to Selected Images-Sync
Next we
select the images to apply the color correction parameters and click
on the Sync button and the color correction settings are applied to
all of the selected images. At this point the color correction is
only applied to the proxy (thumbnail) image and can be still be
changed.
![]()

Step 5-Check Corrected
Images and Save
Next
we check a few of the images to make sure the color correction settings are
okay. If not, further adjustments can be made to specific images.
After checking a few images to be sure the color correction is okay, select
the thumbnails you wand to Save. The Save button title will reflect
the number of selected images and, when clicked, will apply the changes to
the images and put them in the destination folder selected in the
Preferences (Step 1)
How Long Did it Take to Color Correct 15, 3MB+ images with similar color problems?
Total Time: 2minutes, 4 Seconds!!