iCorrect EditLab Pro eliminates the frustration of color correction and color editing. iCorrect EditLab Pro consists of four separate tool sets identified by four distinct tool tabs. The four tool sets are logically arranged from left to right and offer a wizard-like approach to accurate color. The tool sets are designed in such a way that as you progress from left to right, the tools will not, and in fact cannot affect any of the tools to its left. This alleviates the common frustration of correcting for one thing while throwing off another. With iCorrect EditLab Pro, one pass through the tools and you are finished.
Four logically arranged tool sets save time and eliminate the frustration
by taking you step-by-step through the color correction process.
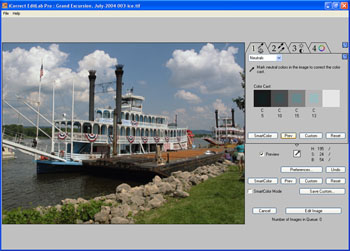
Tab 1 – Color Balance: Remove color cast and correct white balance.
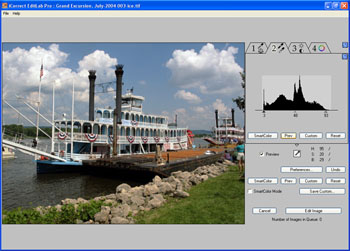
Tab 2 – Tonal Range: Set black point, white point and midpoint.
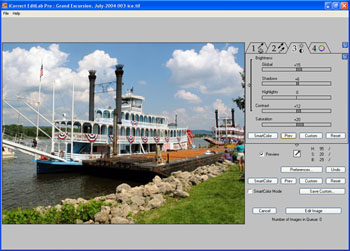
Tab 3 - Brightness/Contrast/Saturation: Adjust brightness, contrast, and saturation.
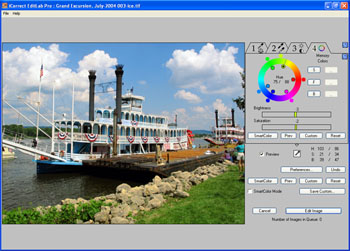
Tab 4 – Hue-Selective Edits: Make color corrections on a hue-selective basis for extra precision.
| Tool Tab 1: Color Balance | Tool Tab 2: Tonal Range |
 |
 |
| With the first tool tab, you begin by correcting the color balance by simply clicking on any neutral (black, white, or gray) colors within the image. In this case the display shows that the original image had a predominantly cyan color cast. | The next tool tab establishes the tonal range by automatically setting a new black point and new white point. You can also adjust the mid tones in the center of histogram display. |
| Tool Tab 3: Brightness/Contrast/Saturation | Tool Tab 4: HueSelect Technology |
 |
 |
| The third tool tab addresses brightness, contrast, and saturation. You can even adjust the highlights and shadows independently. | The final tool tab allows you to finely tune specific colors on a hue-selective basis. Simply activate a color on the hue-wheel by clicking on a color in your image. You can then adjust its hue along the color wheel as well as independently adjust its brightness and saturation. We have also pre-programmed several commonly used "memory" colors like Sky Blue, Foliage Green, and Skin Tones for your convenience. |


