4a. Capturing the Chart: ColorChecker
In conventional, film based photography, exposure is often determined by using an 18% gray card, from which a light meter measures an "average"
brightness of the scene. If there are any very bright objects in the scene, their detail is compressed (but usually still retained) due to the
gentle roll-off of film's characteristic curve. (A card that reflects 18% of the incident light provides a shade of gray that appears to the eye
to be halfway between pure white and pure black — a phenomenon caused by the nonlinear response of the human visual system.)
Digital photography is different. The solid state sensors in the camera produce progressively more output as the amount of light increases, right up
to the point that they reach their limit, where they abruptly "hit the wall" or saturate. There is no gentle roll-off as is seen with film. Therefore,
proper exposure for digital photography is usually determined by looking at white instead of gray.
When photographing the ColorChecker chart, here is a checklist of things to consider:
- Make sure that the chart is evenly illuminated. A good way to do this is to fasten the ColorChecker chart onto the center of a gray
card which is a couple inches larger than the chart. This produces an even gray "frame" around the outer edge of the chart.
The RGB values
of this frame should be fairly consistent as you examine them at various locations on the frame. If the illumination is uneven, adjust your
lighting before proceeding to make the profile.
- Adjust the exposure and balance so that the ColorChecker "White" patch has an RGB value of about 243. Be absolutely certain that
its value is less than 255!
- If your camera control software has curves or other controls, adjust them to strive for these "ideal" values for the neutral patches:
It is
not critical that these exact values be achieved, the point is to use them as a guide. If you are capturing more than 8-bits per channel,
you do not need to strive for the above values — just capture the raw data.
- Note that the ColorChecker "Black" patch is not black at all, but only a dark gray. A very common mistake is assuming this patch to be black
and shooting the chart so that its RGB values are close to zero. Don't do that!
- Include a light trap in the scene, if possible. A light trap is a small, closed box which is painted flat black inside
and out, having a square hole cut into the center of one of the box faces. A good size is a cube measuring about four inches on a side with the
hole measuring about one and one-half inches. The idea is that any light entering the hole will be trapped inside the box and not
escape. So in a photograph of the light trap, the RGB value for the hole should be close to zero. The use of a light trap will also underscore
the significant difference between a real black (the light trap) and the ColorChecker "Black." Here is a picture of a light trap (with its cover removed):
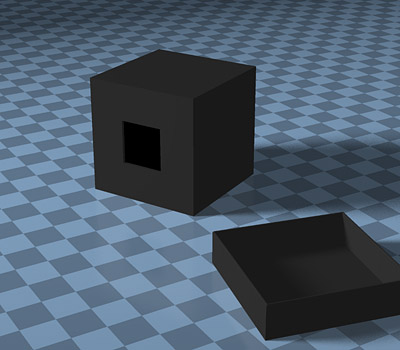
If you want to go to the extra trouble,
line the inside of the box with light absorbing
blackout material, and make a cover for the hole for when the box is not in use.
- When capturing your real pictures under these same lighting conditions, you may need to adjust the camera exposure slightly on
an image-by-image basis so that the brightest white object in the scene does not saturate. The adjustment should be in exposure only, that
is, nothing affecting the color balance.